Captyn already sends automatic emails to your customers when they register, move a class, or cancel. You can further optimize this communication by creating custom templates.
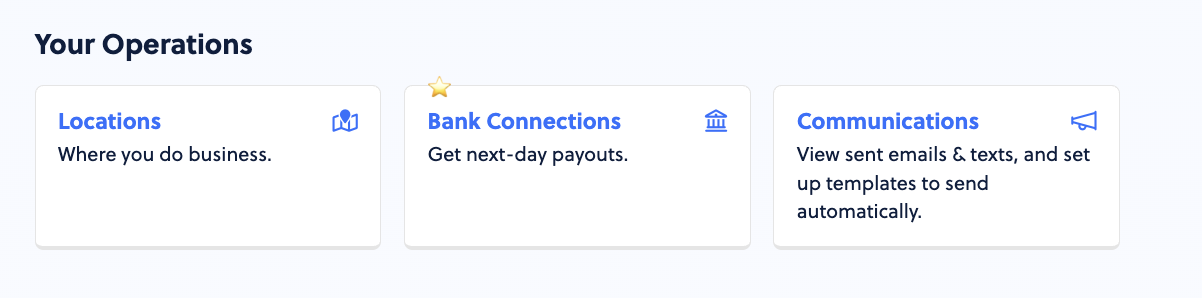
It’s easy to create a new template to be sent when a customer registers for one of your program offerings. To get started, head to Settings & Reports from the menu and choose Communications.
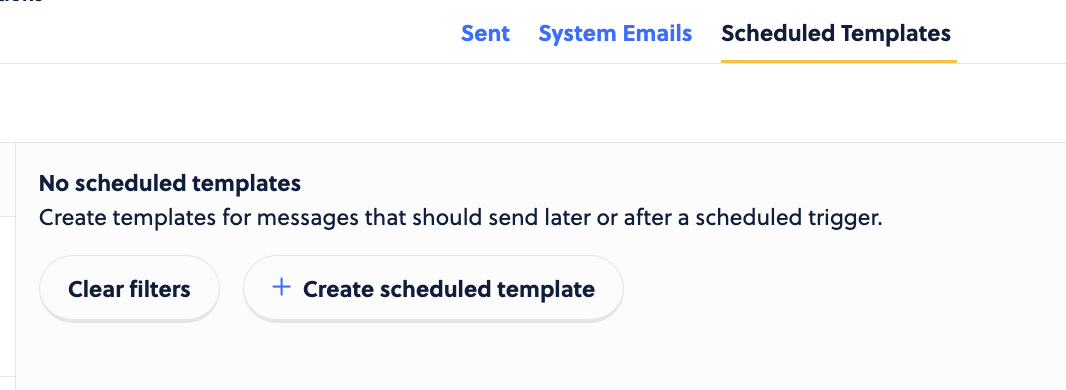
Choose Scheduled Templates along the top and then + Create scheduled template.
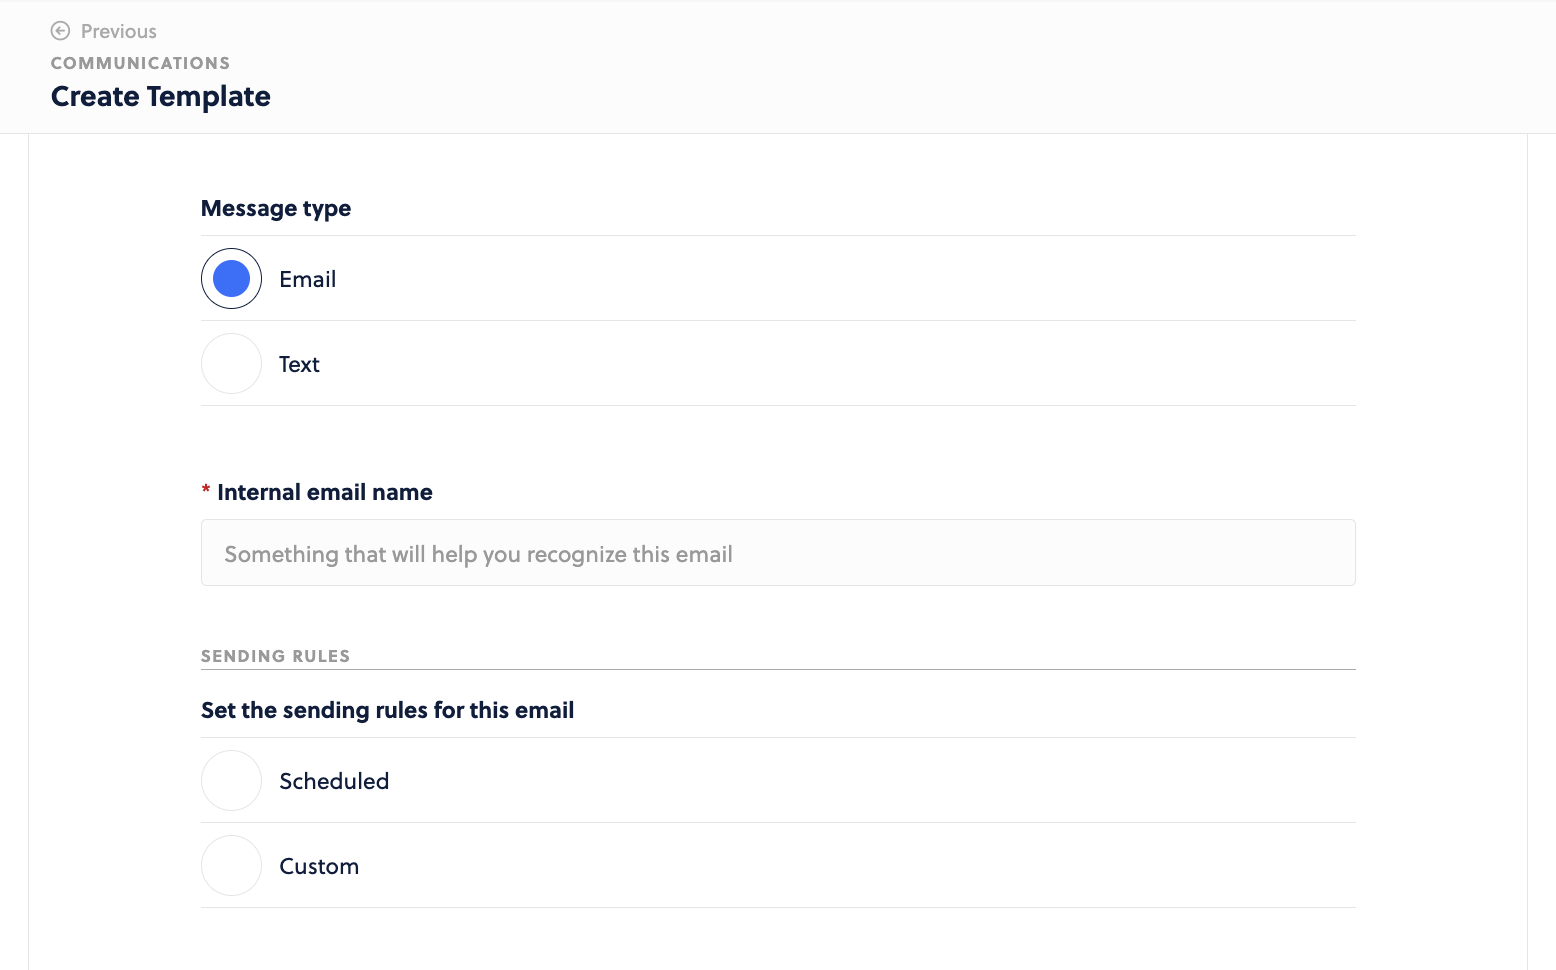
Choose whether this is an Email or a Text, give it an Internal name (required), and then for this purpose of setting it on the offering in response to a registration, skip the scheduled/custom piece (more on this later).
Next up, set the details:
The from address
Any CC’d addresses
Subject line
Message body
Enable it automatically for any newly created offering
Make it global - applied to any and all offerings at any point
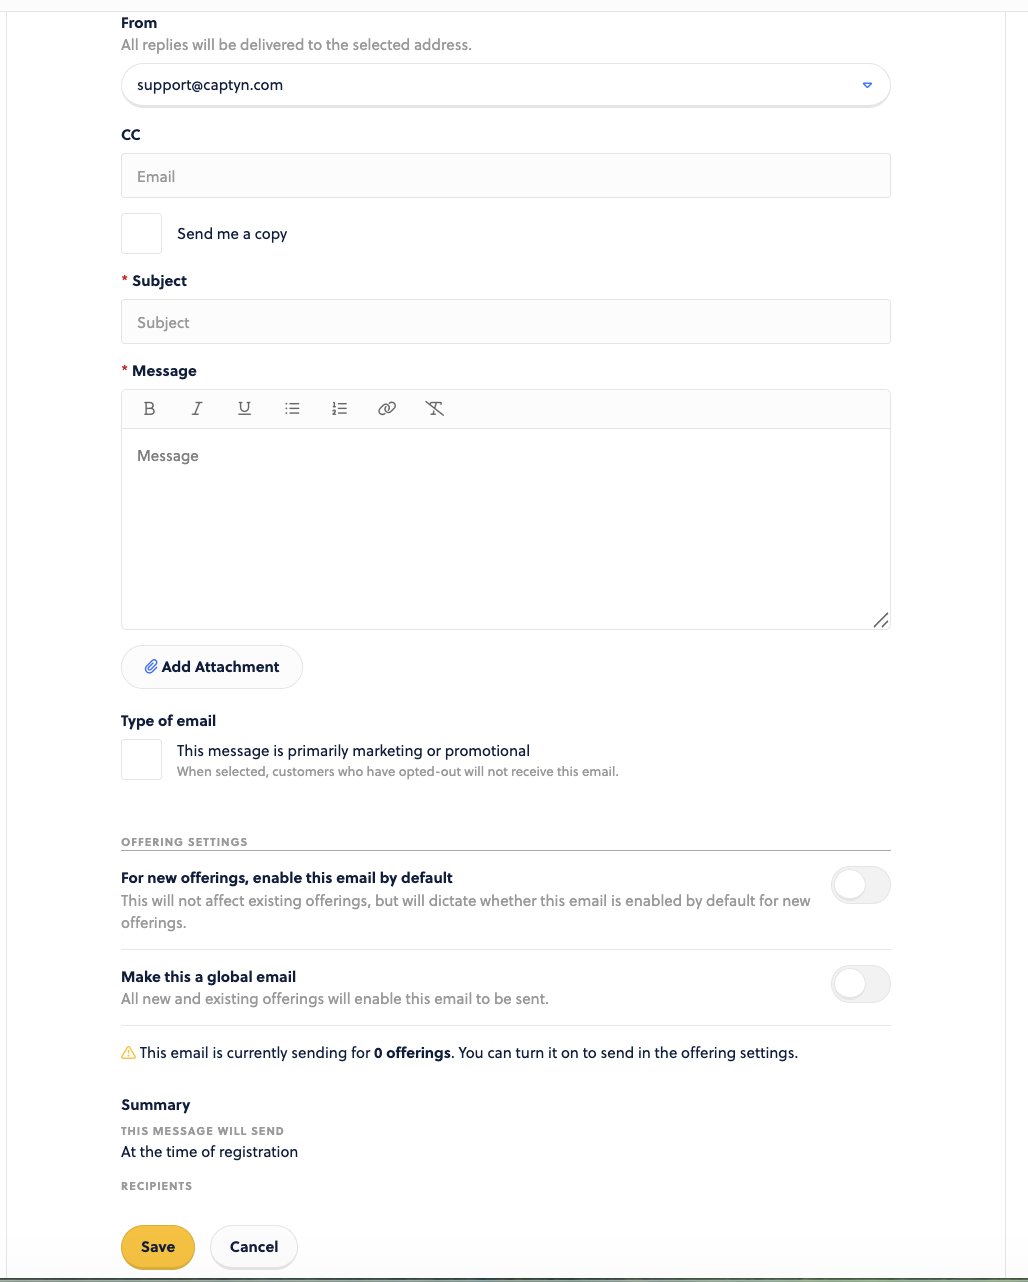
Choose to Save this and it is ready to go. You will see the message now in the log of the Communications page with options to Edit it or Delete it.

Once the email has been created, it needs to be enabled in your Offerings. To do this, head to an offering, and click on the Communications tab on the left hand side and select the slider to enable this email for new registrations.
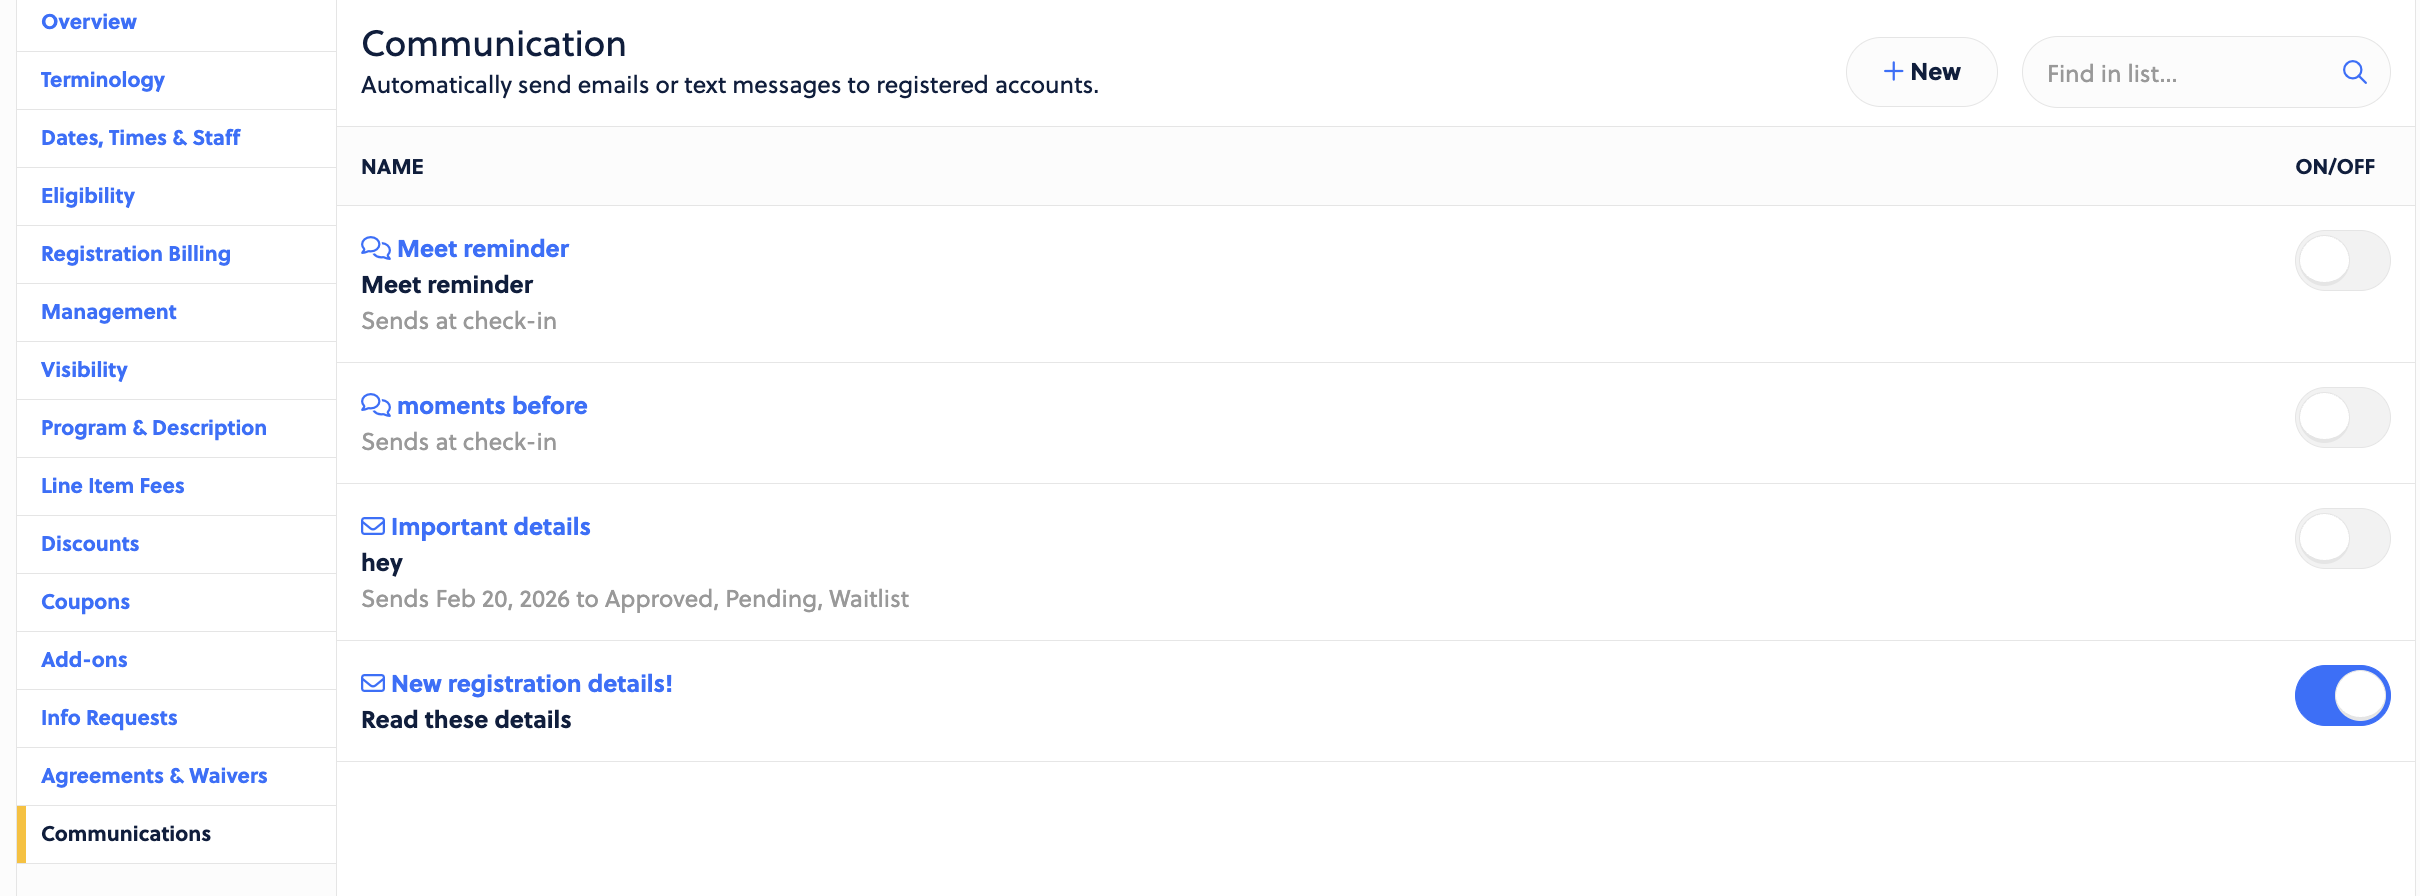
You can also set your templates to send at a custom time.
This can be set for Emails or Texts.
When crafting the email, choose “Scheduled”, set the date, and the time, and which grouping of participants to send this to.
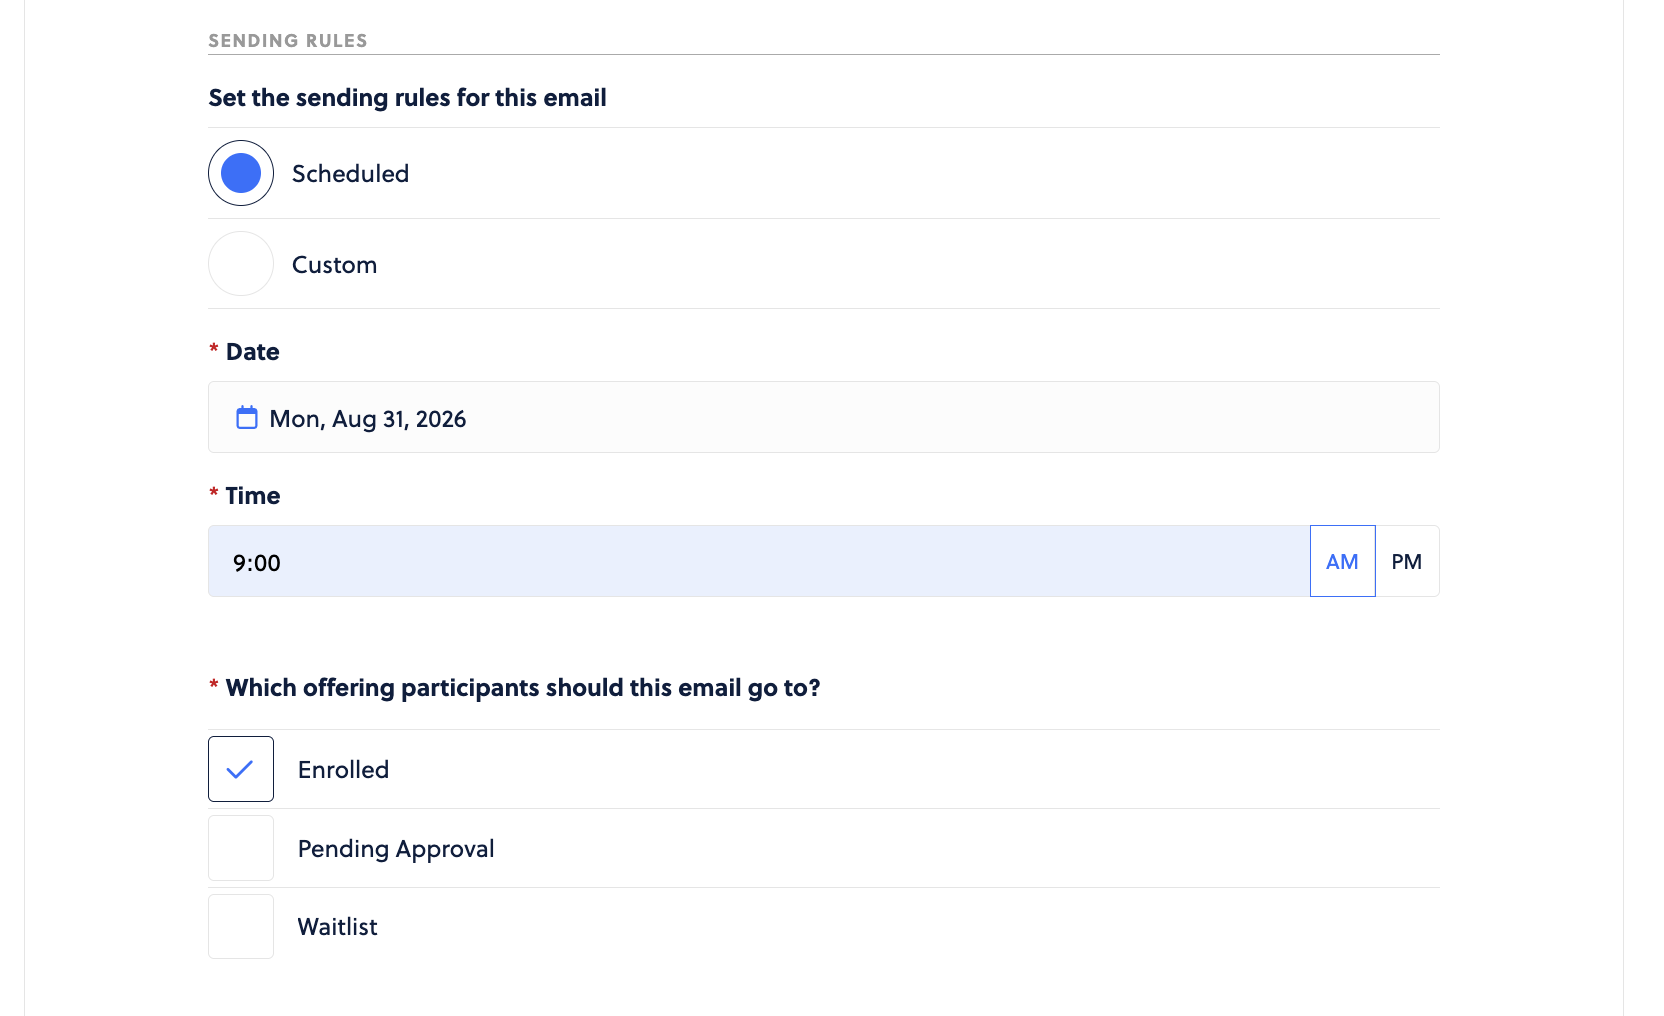
Follow the same steps as outlined above to get this fully configured.
We also offer the ability to have automatically triggered based on a preset series of actions that can happen.
This can be set for Emails or Texts.
Choose Custom as the sending rule here and the choose when it should send:
At the time of registration
At the time of check in
Before each schdeuled instance
After registration
Before the first start time
After the first start time
Before the final end time
After the final end time

Follow the same steps as outlined above to get this fully configured.
